
Automatic Tax Calculation with Stripe Tax (Stripe Checkout)
Event Espresso's Stripe Checkout payment method can let Stripe Tax automatically calculate and charge the correct sales tax / VAT / GST based on each customer's location, and then record that tax back on the Event Espresso transaction. This means you don't have to manually configure tax rates for every region — Stripe determines the right rate at checkout and Event Espresso keeps your transaction totals in sync.
At a glance
- Tax is calculated by Stripe at checkout, based on the buyer's billing address and the tax registrations you've set up in Stripe.
- The tax is written back into Event Espresso so the transaction reconciles correctly (it shows as Complete, not Overpaid).
- It works only with the Stripe Checkout payment method (the off-site/redirect method), and requires Stripe Tax (a paid Stripe feature) to be enabled in your Stripe account.
How it works
- A customer registers for your event and chooses Stripe Checkout as the payment method.
- They're redirected to Stripe's secure hosted checkout page, where they enter their billing address.
- Stripe Tax calculates the applicable tax for that location and displays it on the payment page.
- The customer pays the ticket price plus the calculated tax.
- Event Espresso records the tax Stripe charged as a tax line on the transaction, so the order total matches the amount paid and the transaction is marked Complete.
- A webhook from Stripe acts as a safety net, ensuring the tax is recorded even if the customer closes the browser before returning to your site, or pays with a delayed payment method.
⚠️ Important limitations — please read before setting up
- It replaces Event Espresso's own taxes — they cannot be used together. When Stripe Tax is on, Stripe is the only tax authority. Your tickets must be non-taxable and you should not have Event Espresso taxes configured for events sold through this method. If you leave an Event Espresso tax in place, buyers can be double-taxed. (Event Espresso will show a warning on the settings page if it detects this conflict — see Troubleshooting.)
- Stripe Checkout only. This works with the Stripe Checkout payment method, not the "Stripe (onsite)" credit-card method.
- Stripe Tax is a paid Stripe feature. You must enable it in your Stripe account, and Stripe charges a fee on transactions where tax is calculated. See Stripe's pricing for current rates.
- You must register your tax jurisdictions in Stripe. Stripe only calculates tax for locations where you've added a tax registration. If you haven't registered a location, Stripe returns $0 tax for buyers there.
- The transaction's "Recalculate Taxes and Total" button is hidden for these transactions (in WP Admin → Transactions). Recalculating would re-apply Event Espresso's tax engine and break the Stripe tax, so it's intentionally disabled, with a note explaining why.
Setup
There are four parts: configure Stripe Tax in Stripe, prepare your Event Espresso tickets, enable the setting, and connect the webhook.
Step 1 — Set up Stripe Tax in your Stripe Dashboard
In your Stripe Dashboard:
- Go to the Tax section (or Settings → Tax) and start/enable Stripe Tax.
- Set your origin address (your business / head-office address). Stripe uses this as the basis for tax calculations.
- Choose a default tax category for your products if prompted (e.g. a general "Services" or "Admission/Event" category, as appropriate for your business — consult your accountant if unsure).
- Add your tax registrations: go to Tax → Registrations → Add registration and add every country/state/region where you are obligated to collect tax, with the correct start date.
- Only registered locations get taxed. Buyers in unregistered locations will be charged $0 tax.
Tip: Do this first in Test mode, then repeat in Live mode. Stripe keeps test and live settings separate.
Step 2 — Make your tickets non-taxable and remove Event Espresso taxes
In WP Admin → Event Espresso:
- Go to Event Espresso → Pricing → Default Pricing (or Tax Settings) and remove (or set to 0%) any Event Espresso global taxes (for example a "Sales Tax" price) that would apply to events sold via Stripe Checkout. Note, change to default taxes applies to future events/tickets only.
- For each ticket, ensure that the ticket price calculator does not apply taxes as a price modifier in the ticket price.
This ensures Stripe Tax is the only tax applied, and prevents double-taxing.
Step 3 — Enable Stripe Tax on the Stripe Checkout payment method
- Go to WP Admin → Event Espresso → Payment Methods and open the Stripe Checkout tab.
- Make sure Stripe Checkout is connected to your Stripe account.
- Find the setting "Calculate tax automatically with Stripe Tax?" and set it to Yes.
- Save / Update the payment method settings.
When this is enabled, additional webhook controls appear directly beneath the setting (Step 4).
If you see a yellow warning box titled "Stripe Tax conflicts with your Event Espresso taxes," it means you still have an Event Espresso tax configured. Go back to Step 2 and remove or zero out the named tax.
Step 4 — Connect the webhook (so tax is always recorded)
The webhook lets Stripe notify your site that a payment (and its tax) completed, even if the customer never returns to your site. Set this up in each mode you use (test and live) — the controls remember each mode separately.
Beneath the "Calculate tax automatically with Stripe Tax?" setting you'll see a "Stripe Tax Webhook:" section. Which controls you see depends on how your site connects to Stripe:
Step 5 — Connected with Stripe (the most common setup)
You'll see the webhook URL plus a "Webhook signing secret:" field. To set it up:
- In your Stripe Dashboard → Developers → Webhooks, click Add endpoint.
- For the endpoint URL, paste the URL shown on the Event Espresso settings page (click the field to select it, then copy).
- Subscribe the endpoint to the
checkout.session.completedevent (you may also add the asynchronous/expired checkout events:checkout.session.async_payment_succeeded,checkout.session.async_payment_failed,checkout.session.expired). - Save the endpoint in Stripe, then open it and reveal its Signing secret (it begins with
whsec_). - Back in Event Espresso, paste that signing secret into the Webhook signing secret field and click Save signing secret.
- You'll see "Signing secret saved (test mode)" or "(live mode)" confirming it's stored for that mode.
To change or clear it later, use Remove signing secret and repeat.
Testing before you go live
- Put Stripe in Test mode and make sure your test-mode Stripe Tax registrations and webhook (Step 4) are configured.
- Register for a test event using Stripe Checkout and a non-taxable ticket.
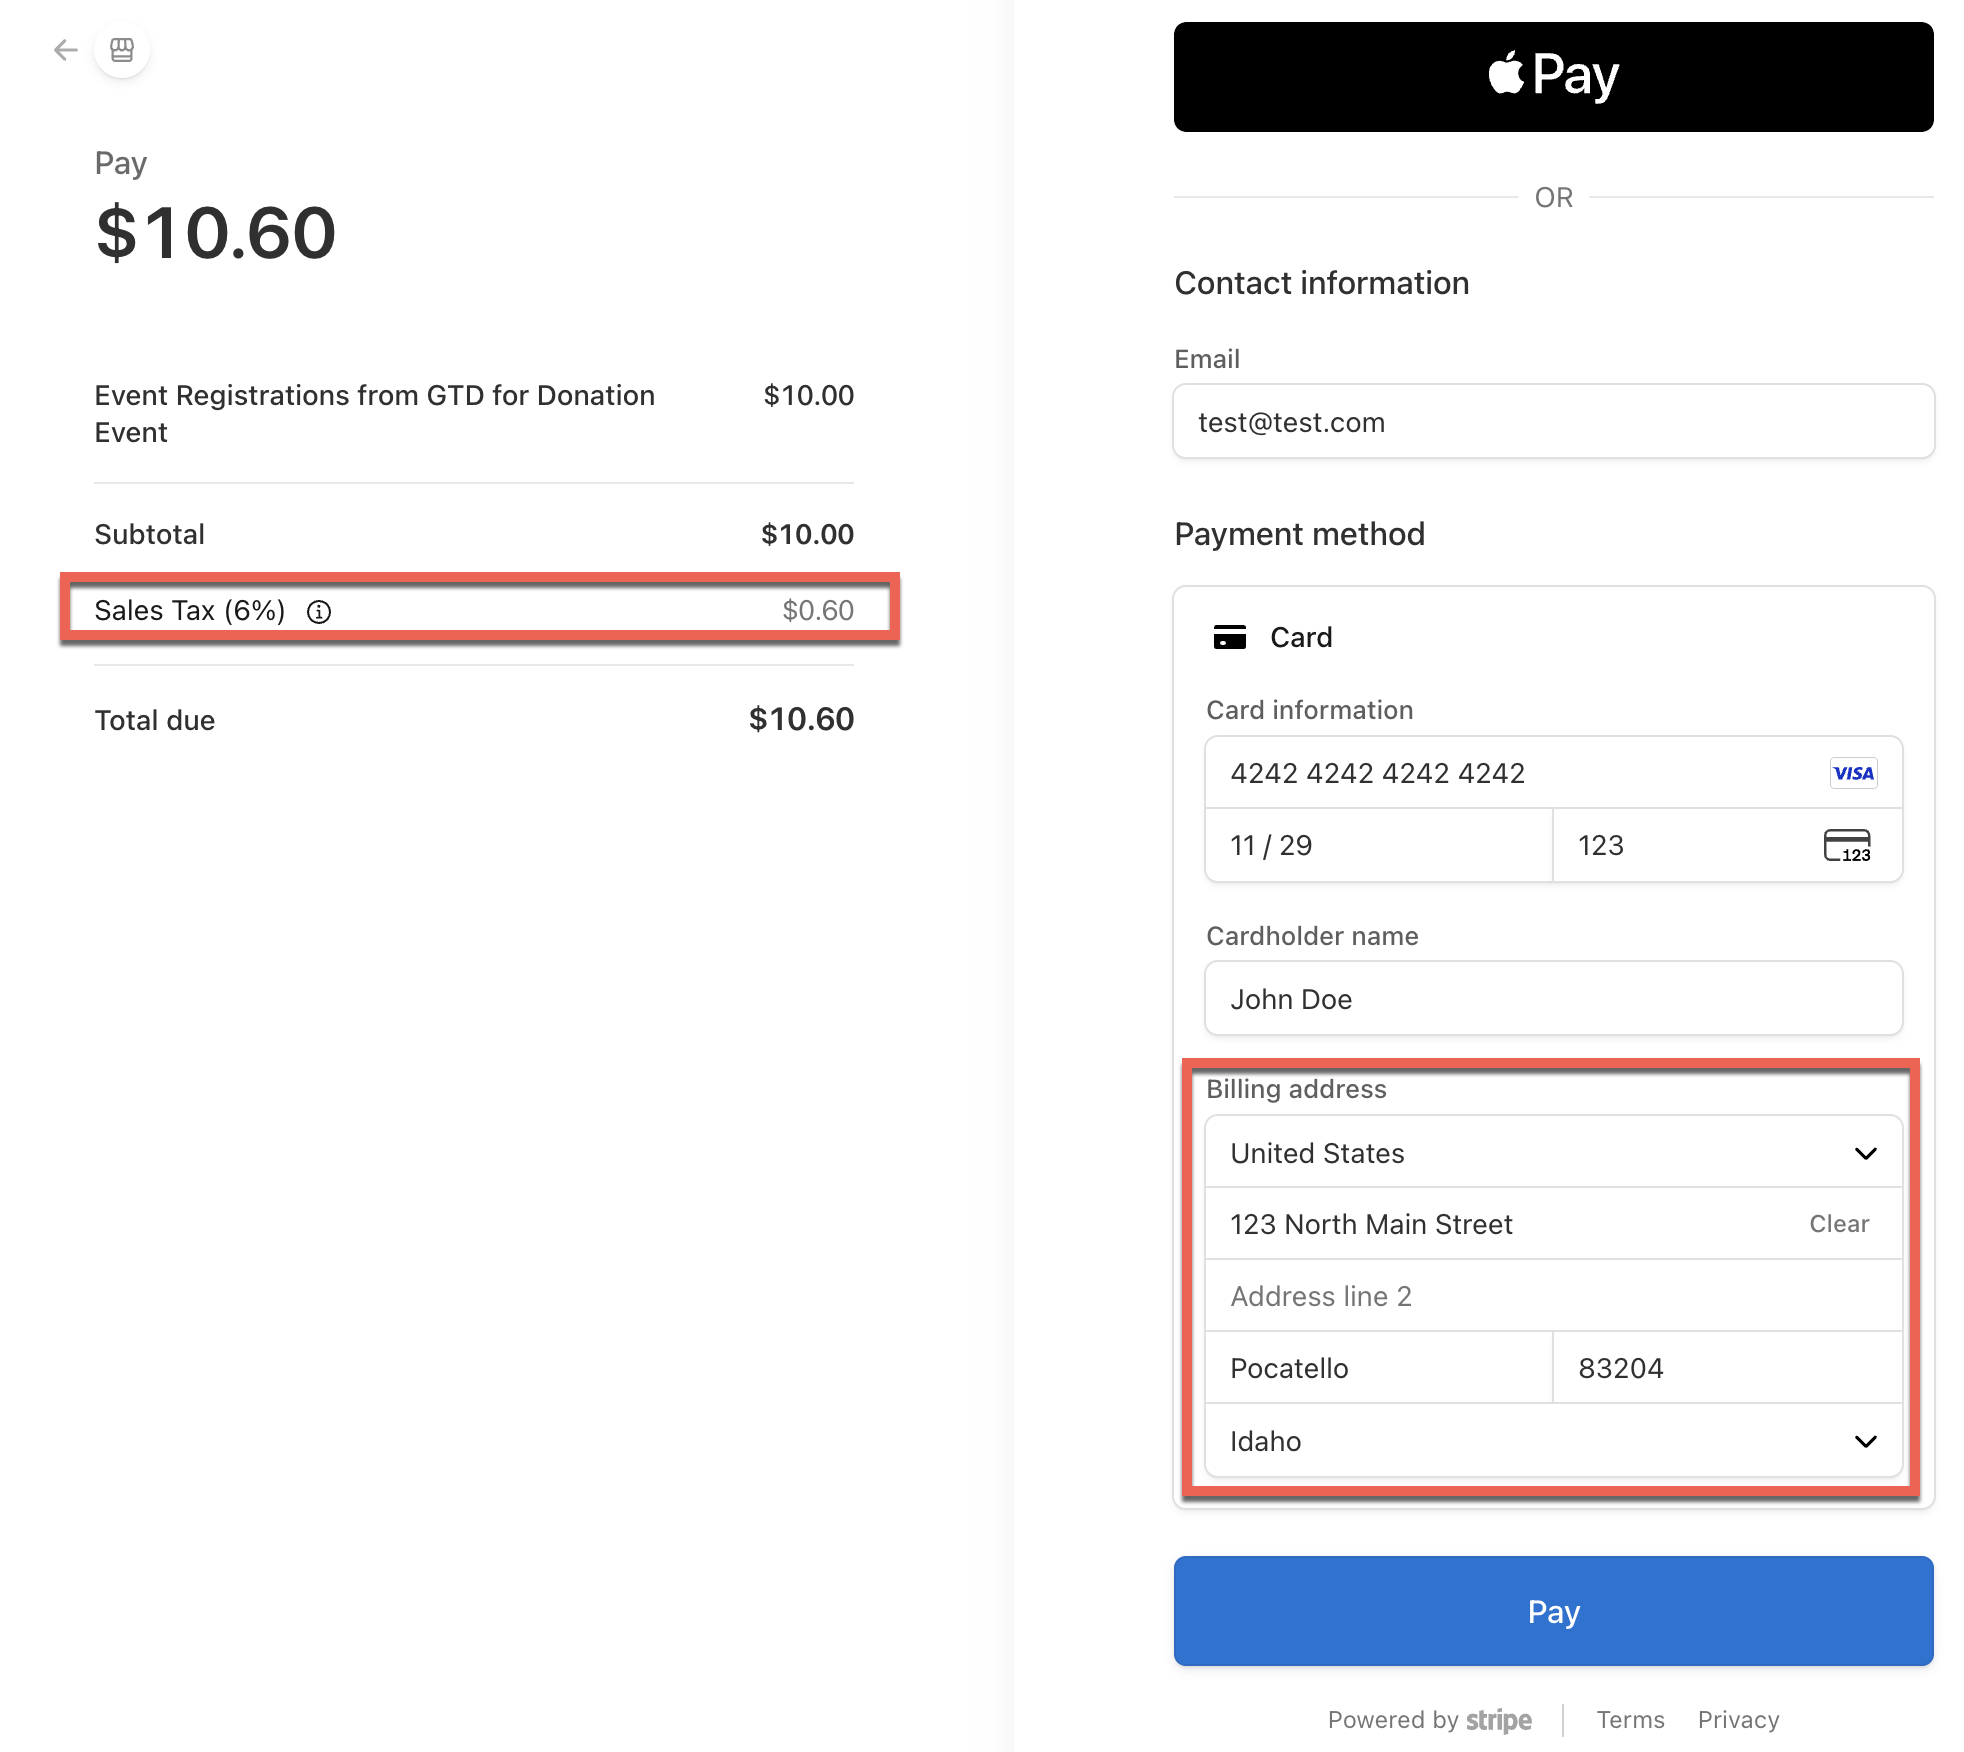
- On Stripe's hosted page, enter a billing address in a region you've registered, and confirm the tax line appears and the total = ticket price + tax.
- Pay with a Stripe test card (e.g.
4242 4242 4242 4242, any future expiry, any CVC, any ZIP). - In WP Admin → Event Espresso → Transactions, open the transaction and confirm:
- A tax line (e.g. "Sales Tax") was added,
- the Transaction Total includes the tax,
- the status is Complete (not Overpaid),
- the "Recalculate Taxes and Total" button is replaced by the note: "Taxes for this transaction are managed by Stripe Tax and cannot be recalculated here."
- Once verified, repeat the Stripe Tax registrations and webhook setup in Live mode.
What your customers see
- On the Stripe hosted checkout page, customers enter their billing address and see the tax calculated for their location added to the total before they pay.
- Your Event Espresso receipt and invoice, and the transaction page, show the tax as a separate line and include it in the total.
Troubleshooting
Stripe charged $0 tax. The buyer's location isn't in your Stripe tax registrations, or Stripe Tax isn't fully set up (missing origin address). Add the registration for that region in Stripe → Tax → Registrations, and make sure you configured the correct mode (test vs live).
The transaction shows as Overpaid / the tax disappeared. This typically happens if the tax wasn't recorded (e.g. the webhook isn't set up and the customer didn't return to the site), or if an Event Espresso tax is conflicting. Confirm the webhook is configured for the current mode (Step 4) and that you've removed Event Espresso's own taxes (Step 2).
I see "Stripe Tax conflicts with your Event Espresso taxes." You still have an Event Espresso global tax configured. Remove or set it to 0% (the warning names the specific tax), then save.
The "Recalculate Taxes and Total" button is missing on a transaction. This is intentional for Stripe Tax transactions — recalculating would re-apply Event Espresso's tax engine and produce an incorrect (overpaid) total. The note on the transaction explains this.
Tax isn't recorded when customers don't return to the site. The webhook isn't set up or the signing secret is wrong/for the wrong mode. Re-do Step 4 for the mode you're using, making sure the endpoint is subscribed to checkout.session.completed .
I'm using Stripe Connect — where do the Stripe Tax settings go? On the connected Stripe account that receives the payments. Make sure that account has Stripe Tax enabled, an origin address, and registrations.
FAQ
Do I still need to set up tax rates in Event Espresso? No — and you shouldn't. When Stripe Tax is enabled, Stripe is the sole tax authority. Event Espresso taxes must be removed for these events.
Can I use this with the onsite Stripe credit-card method? No. Automatic Stripe Tax works only with the Stripe Checkout payment method.
Does it work for VAT/GST, not just US sales tax? Yes — Stripe Tax supports many tax types worldwide. You still must add the relevant registrations in Stripe for each location you're obligated to collect in.
Is there an extra cost? Yes — Stripe Tax is a paid Stripe feature billed by Stripe. See Stripe's pricing page for current rates.
Do I have to set up the webhook in both test and live mode? Yes. The test and live modes are independent; set up the webhook (and your Stripe Tax registrations) in each mode you use.