How to Import Events
Event Espresso provides an easy way to import basic events via a CSV (spreadsheet) file.
This will not allow you to import recurring events. Recurring events can be created using the Recurring Events Manager add-on.
Where to import
The Import Events button is located in the Event Overview page, below the event list itself.
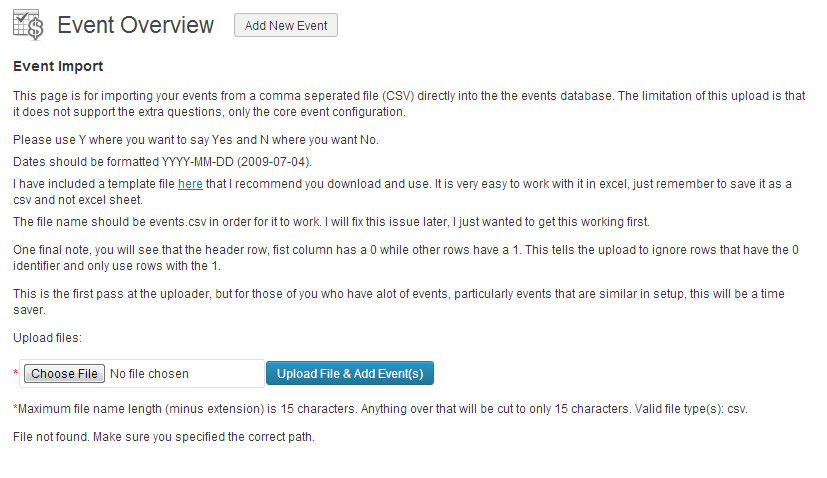
Clicking this button will take you to the import screen. Here you can download a copy of the sample spreadsheet you can use to create your own and import the actual spreadsheet.
Creating a CSV
If you examine the sample spreadsheet you will see that the first row contains all the information about what you can import:
| 0 | This dictates whether the plugin should ignore the entire row or not, 0 = ignore, 1 = import. In general, the first row containing the field titles should be 0 and the rest should be 1 |
| event_name | The event name |
| event_desc | The event description, basic html is allowed |
| address | First line of the address (not venue) |
| address 2 | Second line of the address (not venue) |
| city | City of the address (not venue) |
| state | State/province of the address (not venue) |
| country | Country of the address (not venue) |
| zip | Zip/postal code of the address (not venue) |
| phone | Phone number of the address (not venue) |
| display_desc | Display the event description? Use Y or N |
| event_identifier | Add a unique event identifier |
| start_date | Add the event start date (format = Y-m-d for example 2013-07-25) |
| end_date | Add the event end date (format = Y-m-d for example 2013-07-25) |
| start_time | Add the event start time (format = 10:00:00 AM) |
| end_time | Add the event end time (format = 10:00:00 AM) |
| reg_limit | Add the maximum number of attendees for the event, enter 999999 for unlimited |
| event_cost | The event price, do not use currency symbols! |
| allow_multiple | Allow group registrations? Use Y or N |
| additional_limit | Group size, use numbers only. |
| send_mail | Send the registration confirmation email? Use Y or N |
| is_active | Is this an active event? Use Y or N |
| conf_mail | Add the content of your confirmation email here, basic HTML and email tags are allowed. |
| registration_start | Add the registration start date (format = Y-m-d for example 2013-07-25) |
| registration_end | Add the registration end date (format = Y-m-d for example 2013-07-25) |
Blank Fields
Whilst it is possible to leave some of these fields blank, it is advisable to fill out the following as an absolute minimum
0
Event_name
Event_identifier
Start_date
End_date
Is_active
Registration_start
Registration_end
Importing
Save the spreadsheet as a CSV file named events.csv. Any other name or format will fail to import!
In the Import Events page, click the Choose file button, and select the newly saved events.csv file. Then click the blue Upload File & Add Event(s) button.
You will see a message on screen confirming success or failure.
Important Information
Please note that the use of single quotation marks ( ‘ ) and returns (pressing enter to make a new line) should be avoided in the import file as these can cause errors.


