Messages System: Message Queue System
Message Generation and Sending
The message queue system tracks and prioritizes when messages are generated and when they are sent. When messages are triggered, they are not generated immediately and sent on the same request. Instead, they enter into a queue and all processing happens on separate requests.
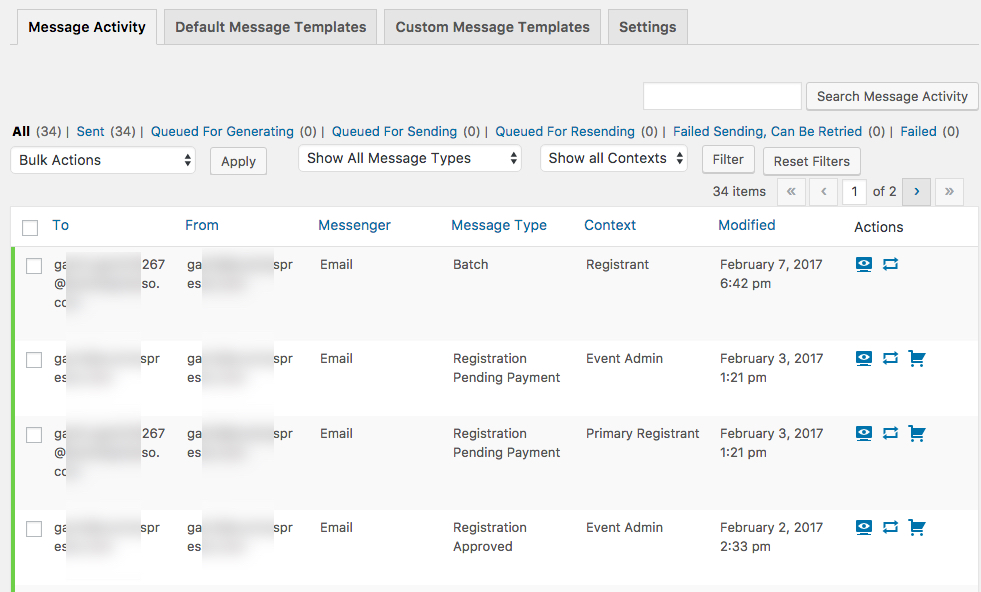
Message Activity list table
You can view the status of messages, resend messages, and delete messages from the Message Activity list table. You open the Message Activity list table by browsing to Event Espresso > Messages.
How to view all of the messages of a specific type
The Messages activity list table will show all message types that have activity on its initial view. You can filter the list down to show one message type by clicking on the selector that says “All Message Types” and selecting the message type you want to view.
How to change the number of messages per page
You click the Screen Options tab on the upper right corner of the page and set the value for Pagination > Message Activity, then you click Apply. The Screen Options tab also has check boxes to allow for hiding and showing specific columns.
How to resend messages
You can resend a specific message by clicking on the Queue for Resending icon , then the message will be added to the queue and will be sent later. You can then send the message immediately by clicking on the Send Immediatley icon .
You can resend several messages together by checking the boxes on the left side of the list table, then you select the appropriate Bulk Action. You select Queue for Resending to add those messages to the queue to send later. You select Send Now to skip the queue and send right away.
Three states of Messages
Messages have three states they progress through when being prepared:
-
- Incomplete
The incomplete state is when the messages system has the information it needs to generate a message. These messages will have the Queued for Generating status and the Generate the message now action will be available.
- Incomplete
-
- Generated
The Generated state is when the message system has readied the message for sending (it has parsed all the short-codes in the templates, etc.) and it is ready for sending. These messages will have the Queued for Sending status and the
Send Immediately action will be available.
- Generated
-
- Sent
The sent state is when the message has been sent. These messages can be queued for resending.
- Sent
How does the message queue work?
Queuing of messages happens in two streams. First, messages are queued for generation. After they are generated messages are queued for sending.
When a message is queued, that means it is saved to the database with a status reflecting its state. Then there is a scheduler that will trigger on a regular interval for batch processing of generation and batch processing of sending.
Messages Retention Settings
Depending on what content you have in your messages, like lots html, css, text, etc. and your server configuration, it is possible that storing so many records could make your database larger than your business needs, or increase the cost of your website backups from storing excess data.
In Event Espresso 4.9.31.p+ we have added a new feature to the Messages system to control how long your website retains a record of the processed messages from your WordPress website. This feature is called "Cleanup of old messages:". The Cleanup of old message feature allows you to control how long a record of the processed messages from Event Espresso is saved.
You are given several options:
- Forever (default, never delete)
- 3 Months
- 6 Months
- 9 Months
- 12 Months
- 24 Months
- 36 Months
We have also provided two filters that will allow you to set a custom retention schedule.

For example, if you chose to set the retention settings to 12 months, the next time the AHEE__EE_Messages_Scheduler__cleanup cron job ran on your WordPress website, it would remove any messages that were older than 12 months (or sent more than 12 months ago). That cron's first run time should be set to midnight for the next day (i.e. if today is January 26, then the schedule should be January 27, 00:00:00).
Navigate to Event Espresso > Messages > Settings. At the bottom of the page is the new setting to control the cleanup of old messages.

